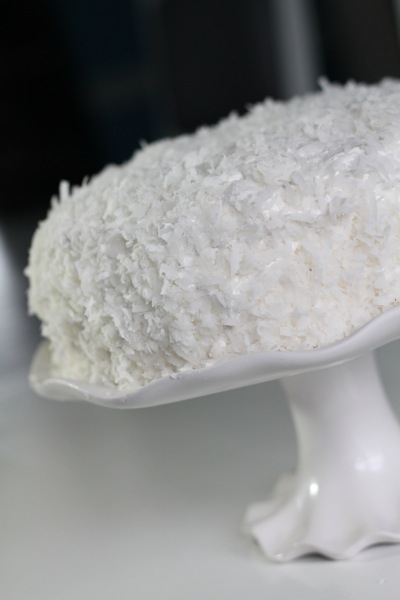
Believe it or not, I have never made a homemade coconut cake and honestly, I have no idea why! I love coconut in anything so I’m not sure what took me so long to get around to it. Thankfully, I made some baking resolutions this year and classic recipes was one of my goals for the year. This cake was the first step to meeting that goal and what a delicious resolution it turned out to be! I wasn’t sure what recipe to use so I simply googled “coconut cake” and the first thing to pop up was a Paula Deen recipe that had LOTS of good reviews so I thought, why not? I’ve not made alot of her recipes but I know her Ooey Gooey Butter Cake is one of my favorites so I thought I’d give the coconut cake a shot.
Initially, I had some reservations about this recipe. First, the cake recipe itself called for self-rising flour which I thought was odd since self-rising flour is typically used for biscuits and such. Second, the filling was a sour cream and sugar mixture which in my mind wouldn’t be nearly as good as the fluffy, whipped cream like filling that seems to be in all coconut cakes. And third, the 7-Minute Frosting recipe was new to me and sounded somewhat complicated so I was tempted to just do a typical buttercream or cream cheese frosting.
But I decided NO. I would try my hardest not to make any changes…and that is HARD for me to do. But I have to say I am SO glad I didn’t change things…this cake was delicious! Not the coconut cake I had in my mind necessarily but still soooo yummy and good. The cake itself was tender and soft, although it was a little crumbly but overall I liked it and it was kind of a cross between a white and yellow cake. I have to admit that I LOVED the filling. I mean, I could have just eaten it with a spoon. It seeped down into the cake an made it very moist. I would only change the amount of coconut in it, maybe increase it to one cup because I would have liked more coconut between the layers. And finally the frosting turned out to not be complicated to make AT ALL and I loved that it was similar to marshmallow creme but infinitely better! What I really loved about the frosting was how easily it went on the cake–I was a little scared because it was so gooey and sticky. But surprisingly not hard to work with at all.
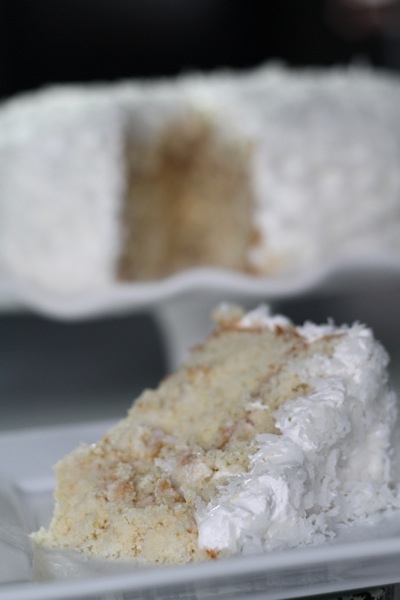
All in all, this was a great first-ever homemade coconut cake. My in-laws loved it which made me VERY happy and my mother-in-law said it reminded her of her mom’s coconut cake and I thought that was awesome! Can’t wait for my next classic cake recipe!
Enjoy!
- 1 c. (2 sticks) Unsalted Butter, room temperature
- 2 c. Granulated Sugar
- 4 Eggs
- 3 c. Self-Rising Flour
- 1 c. Milk (she suggested coconut milk but I had whole milk so I used that)
- 1 T. Pure Vanilla
- 2 t. Coconut Extract
- ¾ c. Sugar
- 1 c. Sour Cream
- 4 T. Milk
- 1 t. Pure Vanilla
- ½ c. Flaked, Sweetened Coconut
- 1½ c. Granulated Sugar
- 1 T. White Corn Syrup
- ⅛ t. Salt
- ⅓ c. Cold Water
- 2 Egg Whites
- 2 t. Pure Vanilla
- 3 c. Flaked, Sweetened Coconut
- Preheat oven to 350 degrees. Grease and flour 3, 9-inch round cake pans and line with parchment paper.
- In the bowl of an electric mixer, cream butter until fluffy. Add sugar and continue to beat on medium-high speed for 6-8 minutes. Add eggs, one at a time, beating well after each addition. Add flour and milk alternately to creamed mixture, beginning and ending with flour. Add vanilla and continue to beat until just mixed. Divide batter equally among prepared pans. Level batter in each pan by holding pan 3 or 4 inches above counter, then dropping it flat onto counter. Do this several times to release air bubbles and assure you of a more level cake. Bake for 25 to 30 minutes (mine took about 27) or until a toothpick inserted in the middle comes out clean. Cool in pans for 5 to 10 minutes and then invert cakes onto cooling rack and let cool completely (I actually cooled mine completely in the pans...inside my refrigerator. 🙂 I was in a hurry.).
- In a medium bowl, stir together sugar, sour cream, milk and vanilla until sugar is completely dissolved. Add coconut and stir to combine.
- Place one cake layer on a cake stand or large plate. (I like to torte the top of my cakes to get them even but this is not a must if you prefer not to do it) Poke holes in cake approximately 1-inch apart with the end of a wooden spoon or chopsticks (which is what I used) until entire cake has been poked. Spread with ⅓ of the filling mixture. Top with second layer, repeat process. Top with last layer and repeat process again. Place in refrigerator while you make the frosting.
- In a stainless steel bowl over a large saucepan of simmering water (fill saucepan about halfway, you don't want the water to touch the bottom of the bowl), place the egg whites, sugar, corn syrup, salt and cold water. With a handheld electric mixer beat the mixture for 4 minutes on low speed. Increase the speed to high and continue to beat for another 6-7 minutes or until the icing is shiny and satiny with soft peaks. Remove from heat, add the vanilla extract and continue to beat on high speed for another 3-4 minutes or until the frosting is thick.
- Frost cake immediately. It is easiest to start by frosting the top of the cake first and then working the frosting down the sides. Press the 3 cups of coconut onto the top and sides of the cake. Refrigerate until ready to serve.



I will be making this coconut cake for an event on April 27, 2013. It is hard finding homade coconut cakes online and I am glad that I found this. It is my first attempt. Do you grease the pans first and then line them or is it the opposite? Thank you very much for the recipe.
Laura, I do grease and flour the pans first and then line them with parchment paper. Excited you are trying it! It’s a good one!